Viewing and Editing Labs
This article provides detailed information for users with ‘Create’ permission on how to view and edit labs.
Viewing All Labs
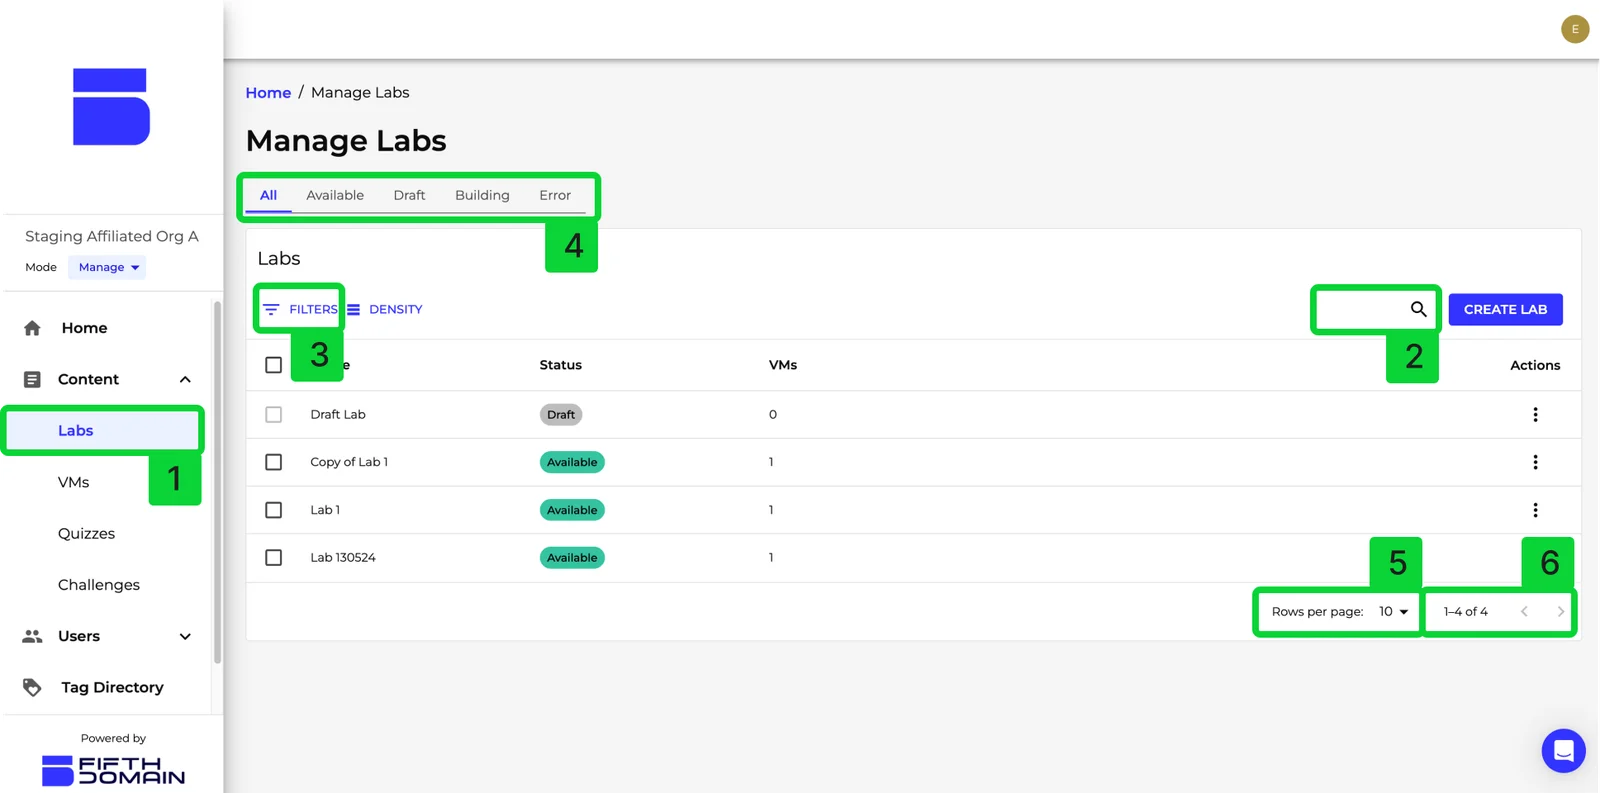
You can view all labs in your organisation by clicking the Labs [1] tab on the left-hand sidebar listed under ‘Manage Content’. You can search for a lab by clicking on the Search [2] icon. You can also filter labs by clicking on the Filter [3] button or clicking on the Status Labels [4]. You can also change the Rows per page [5] displayed, as well as the using the Forward and Back Arrows [6] to click between the pages of the table.
Viewing a Lab
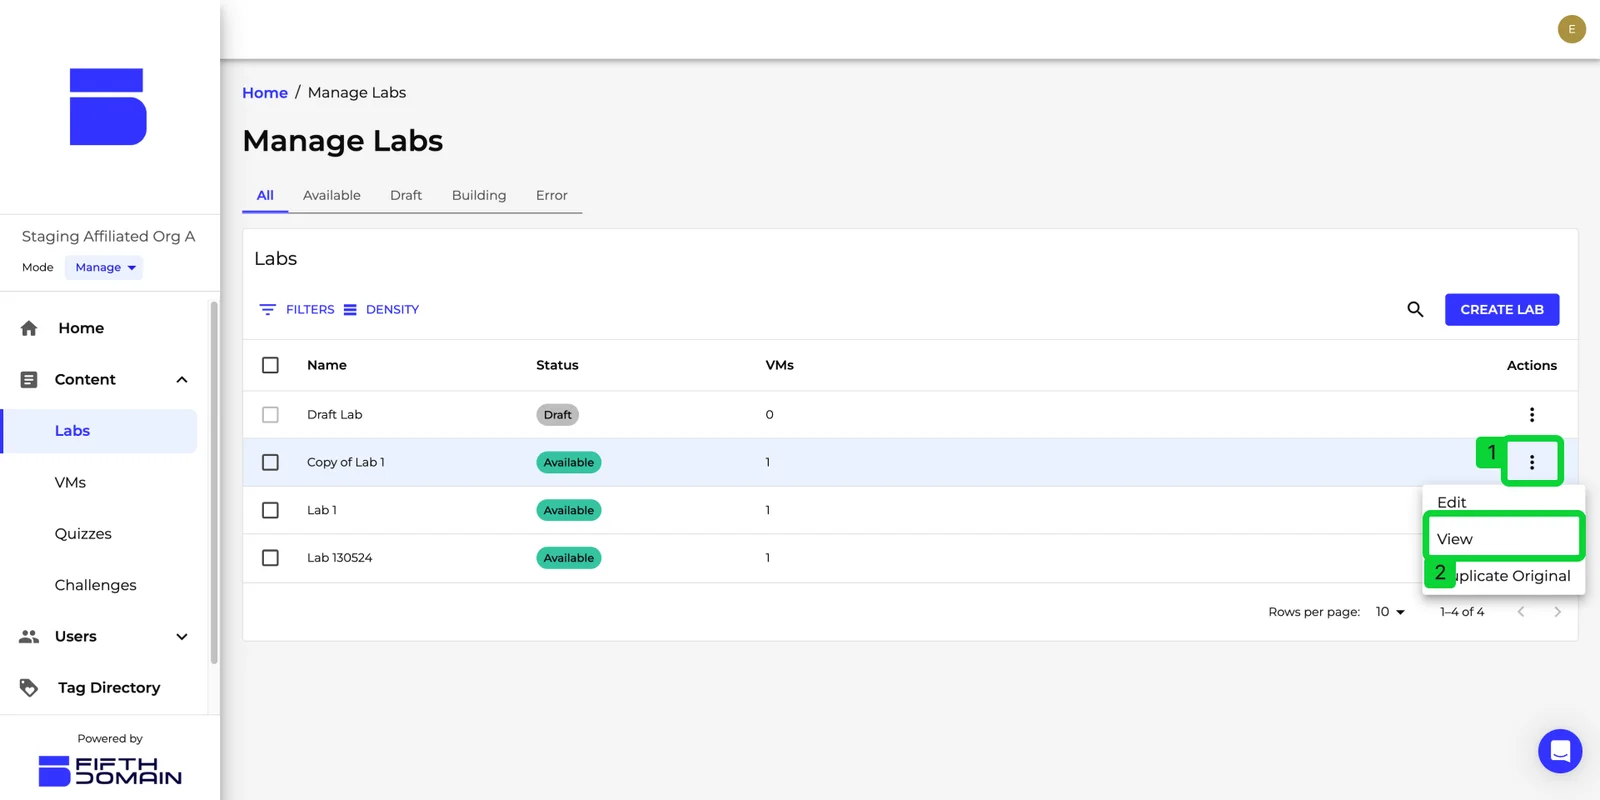
You can view a lab if its status is ‘Available’. Click the Actions [1] icon for the lab you’d like to view and then click the View [2] option from the dropdown menu.
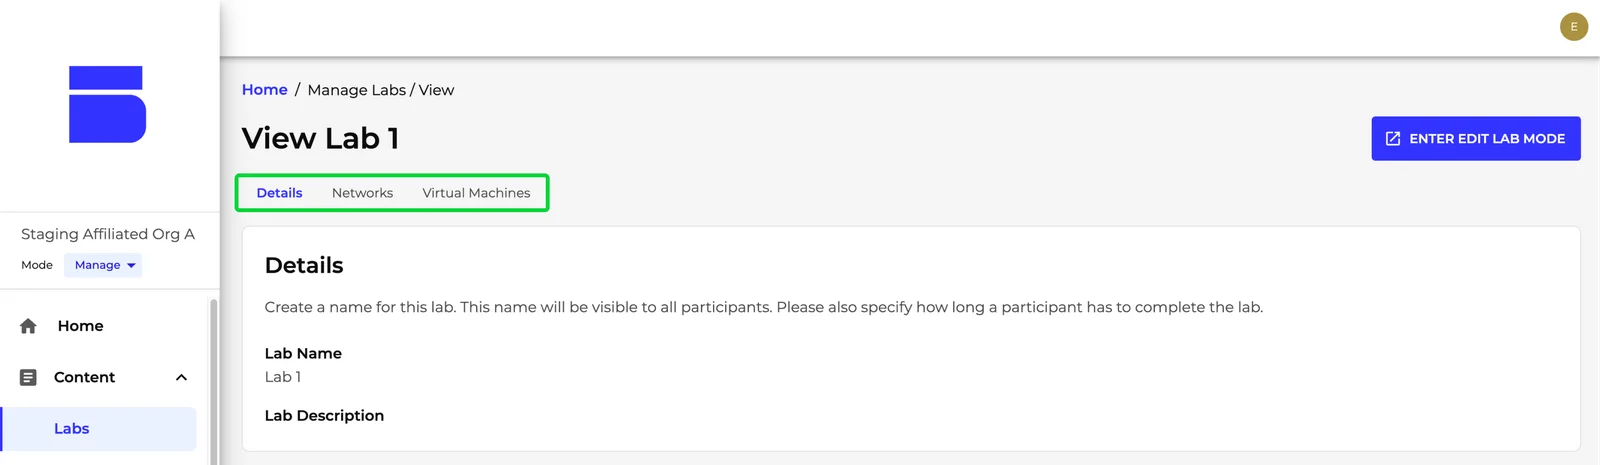
You’ll then be able to view Lab Details, Networks and Virtual Machines by clicking the tabs, as shown in the image below.
Editing a Lab
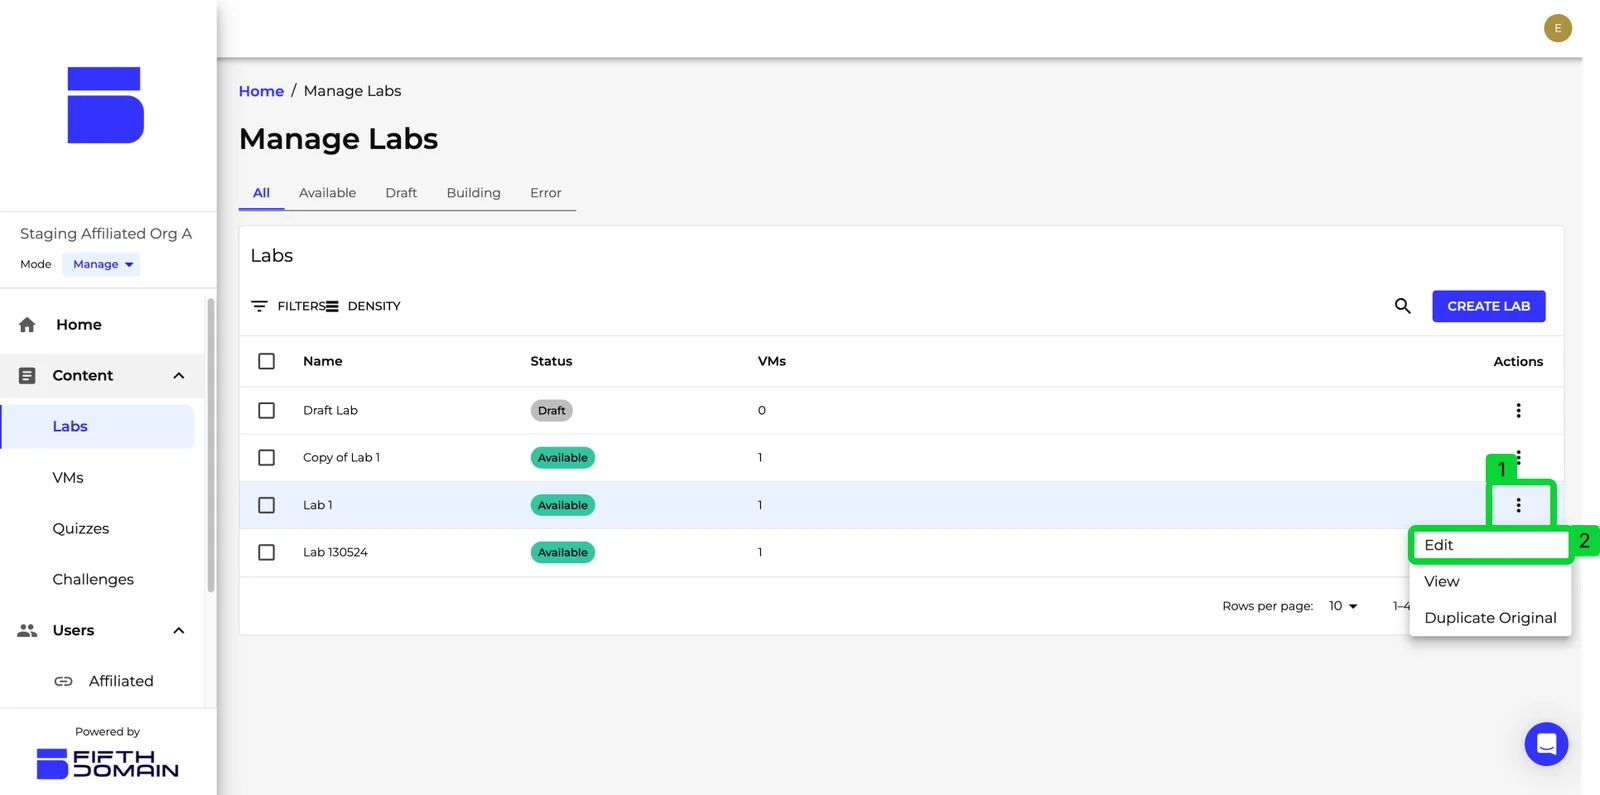
You can edit labs with "Available", "Draft", and "Error" statuses. Click the Actions [1] icon for the lab you’d like to edit and then click the Edit [2] option from the dropdown menu.
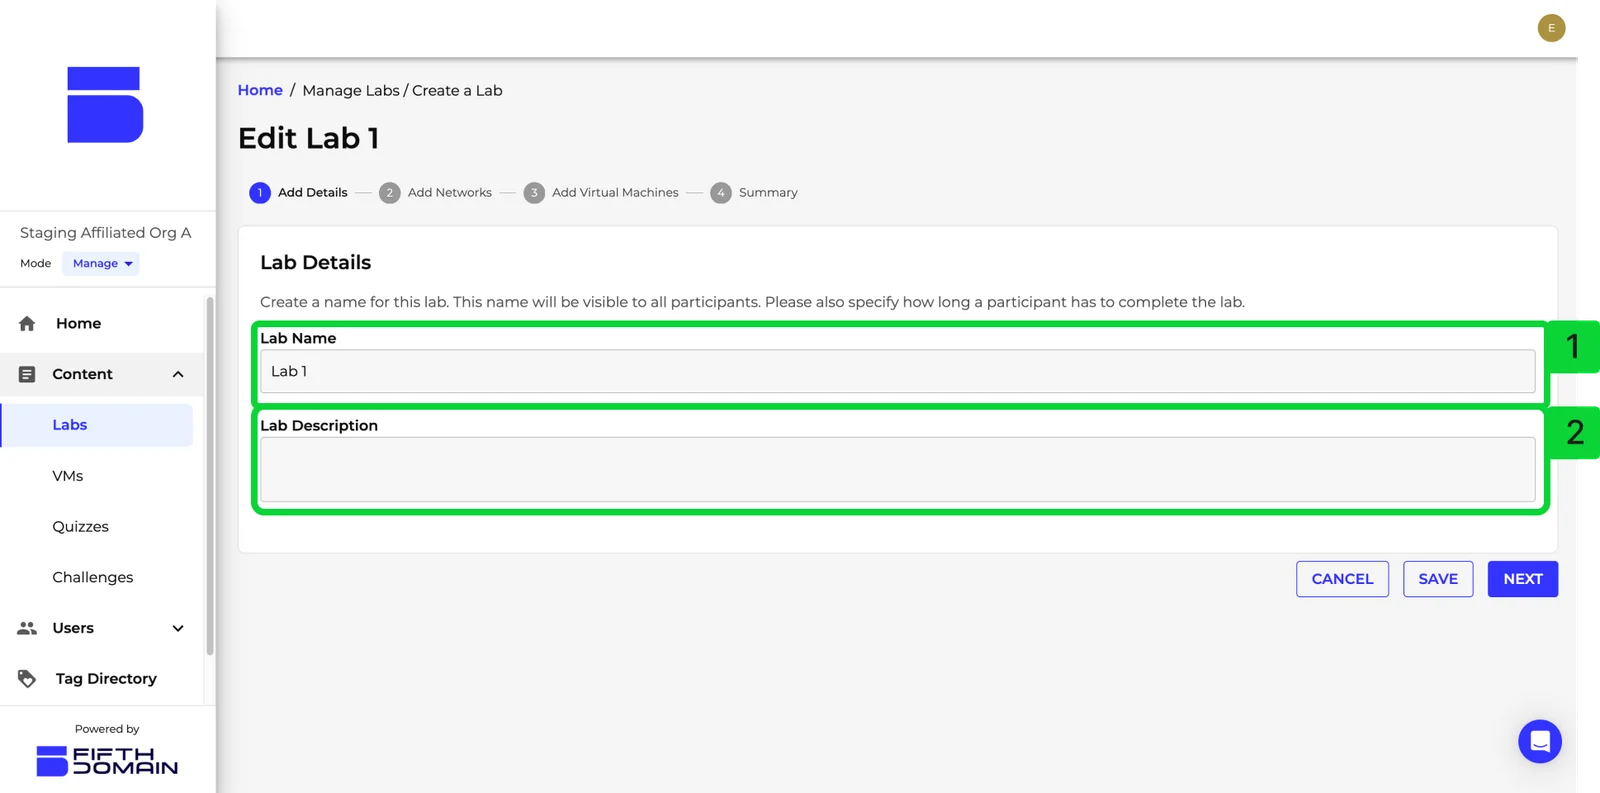
Editing Lab Details
All lab details can be edited including Lab Name [1] and Lab Description [2].
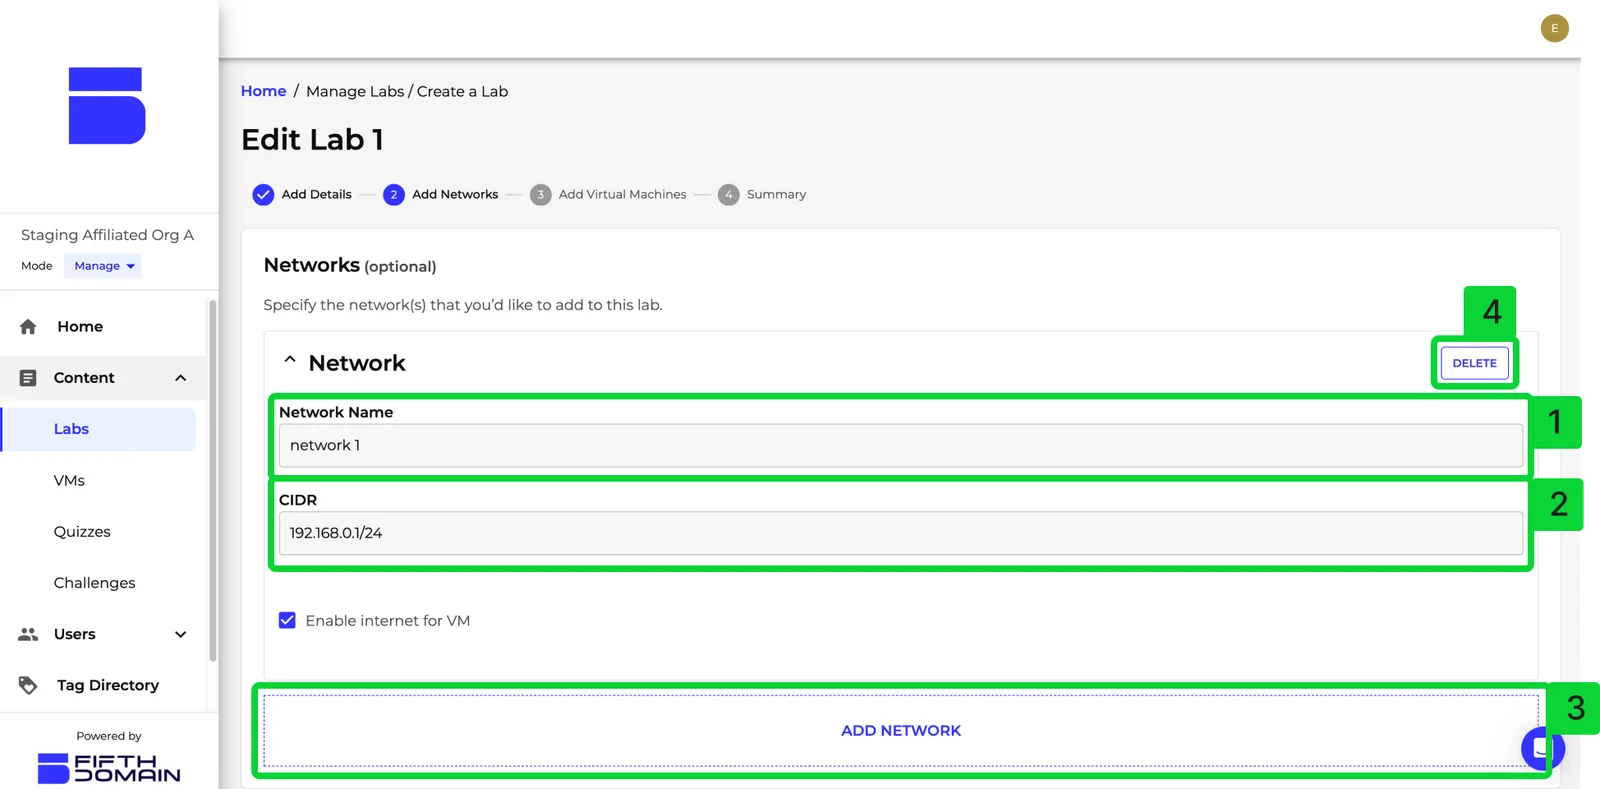
Editing Networks
All network details can be edited including Network Name [1] and CIDR [2]. You can also add additional networks by clicking Add Network [3], or remove a network by clicking Delete [4].
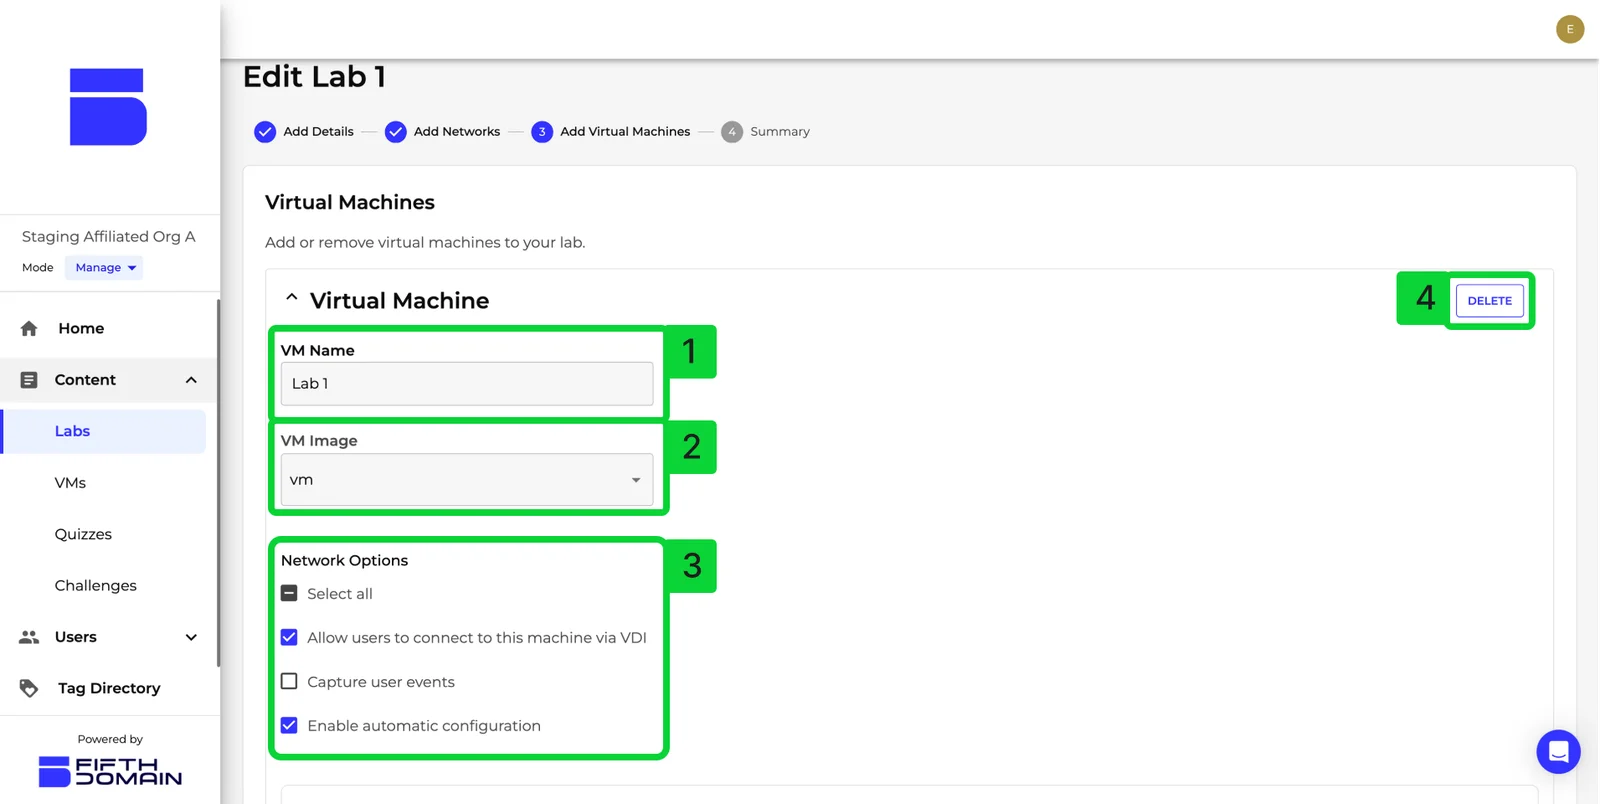
Virtual Machines
All VM details can be edited including VM Name [1], VM image [2] and Network Options [3]. To remove a VM, click Delete [4].
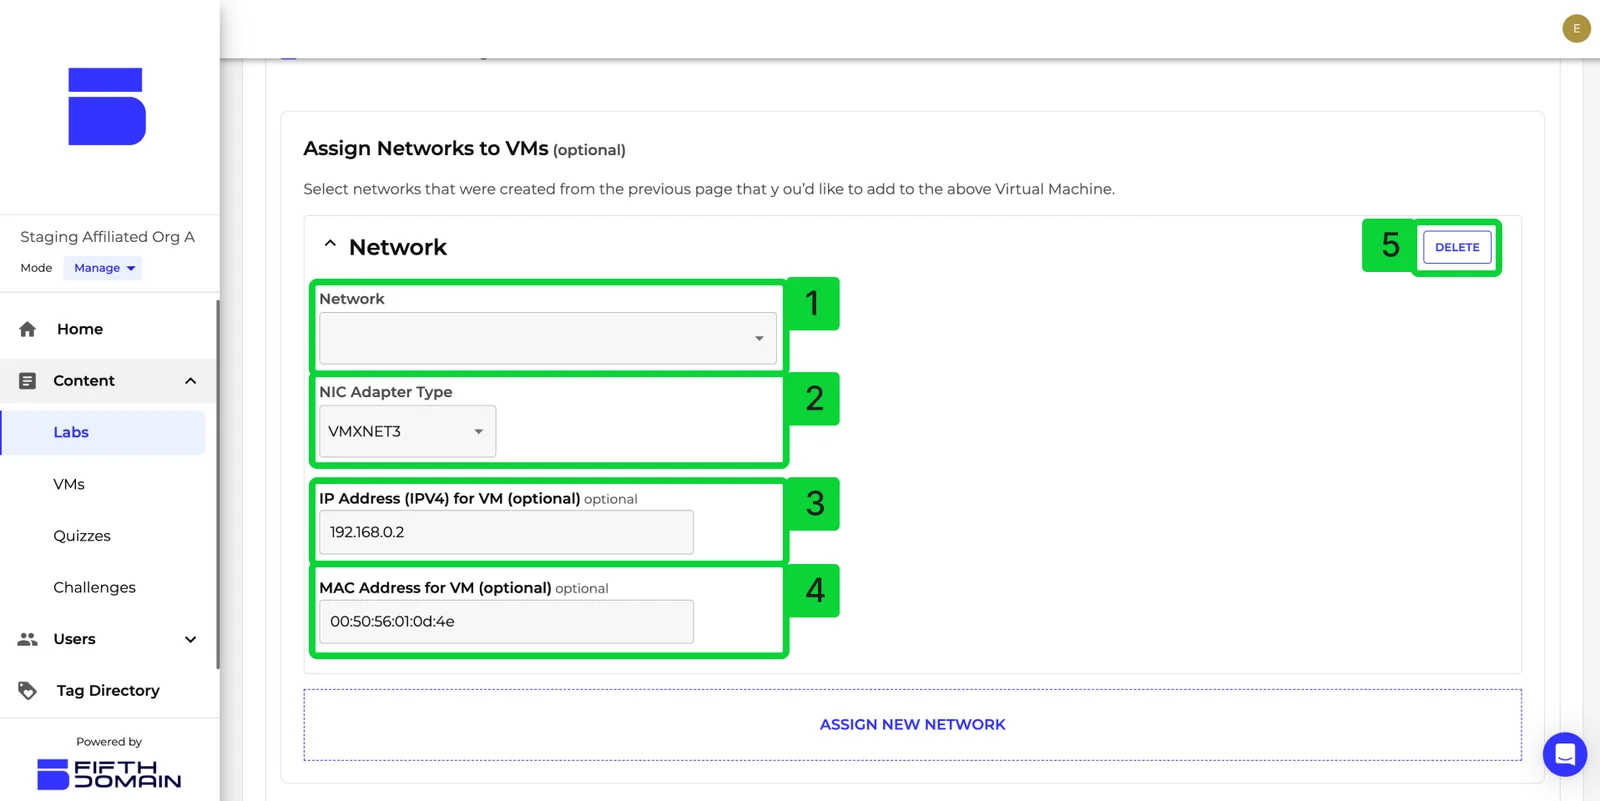
Any networks assigned to a VM can be edited including Network [1], NIC Adaptor Type [2], IP Address (IPV4) [3] and MAC Address [4]. To remove a network click Delete [5].
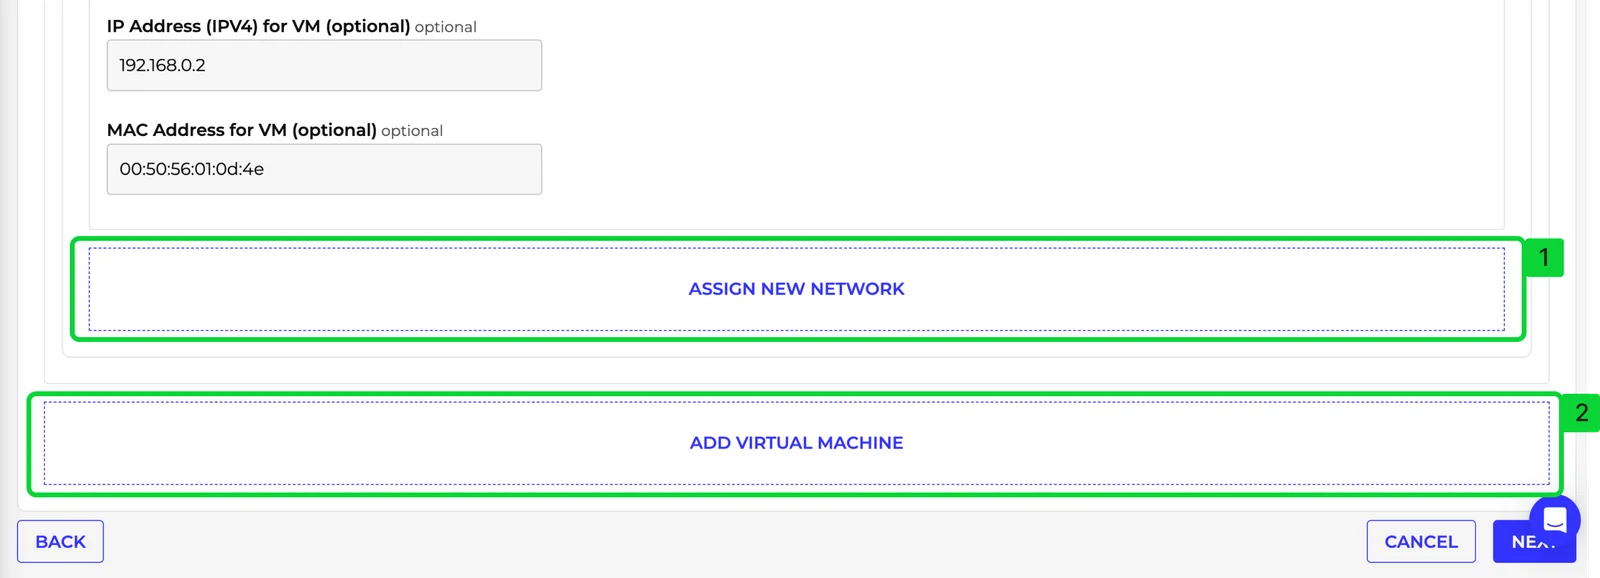
You can also add new networks or VMs by clicking Assign New Network [1] or Add Virtual Machine [2].
Summary
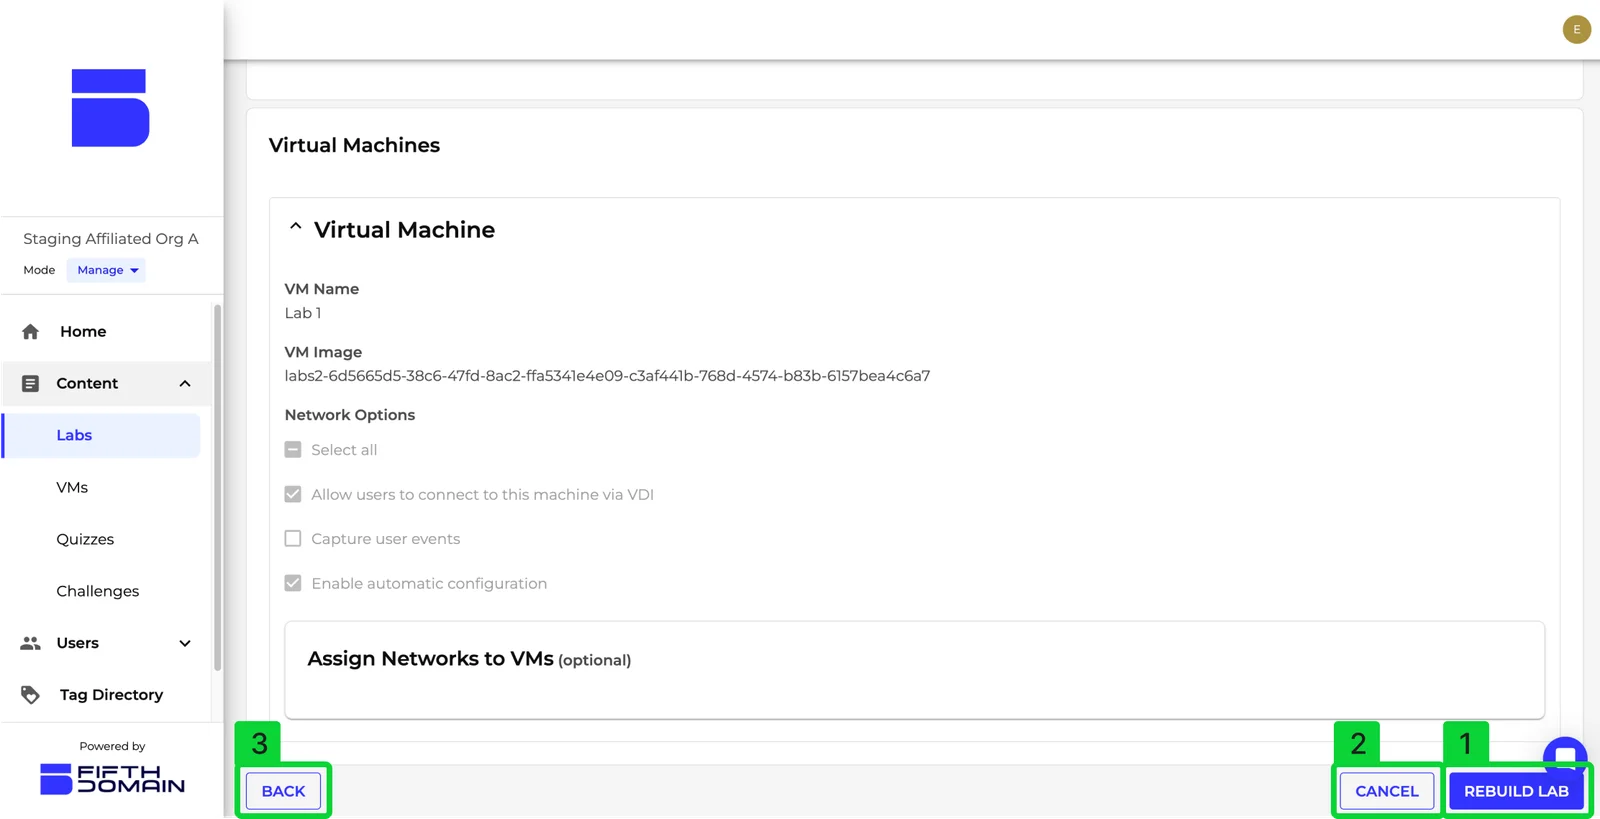
To update the lab, click Rebuild Lab [1]. Click Cancel [2] to lose all changes made to the lab or Back [3] to return to the previous page to make further changes.
Deleting a Lab
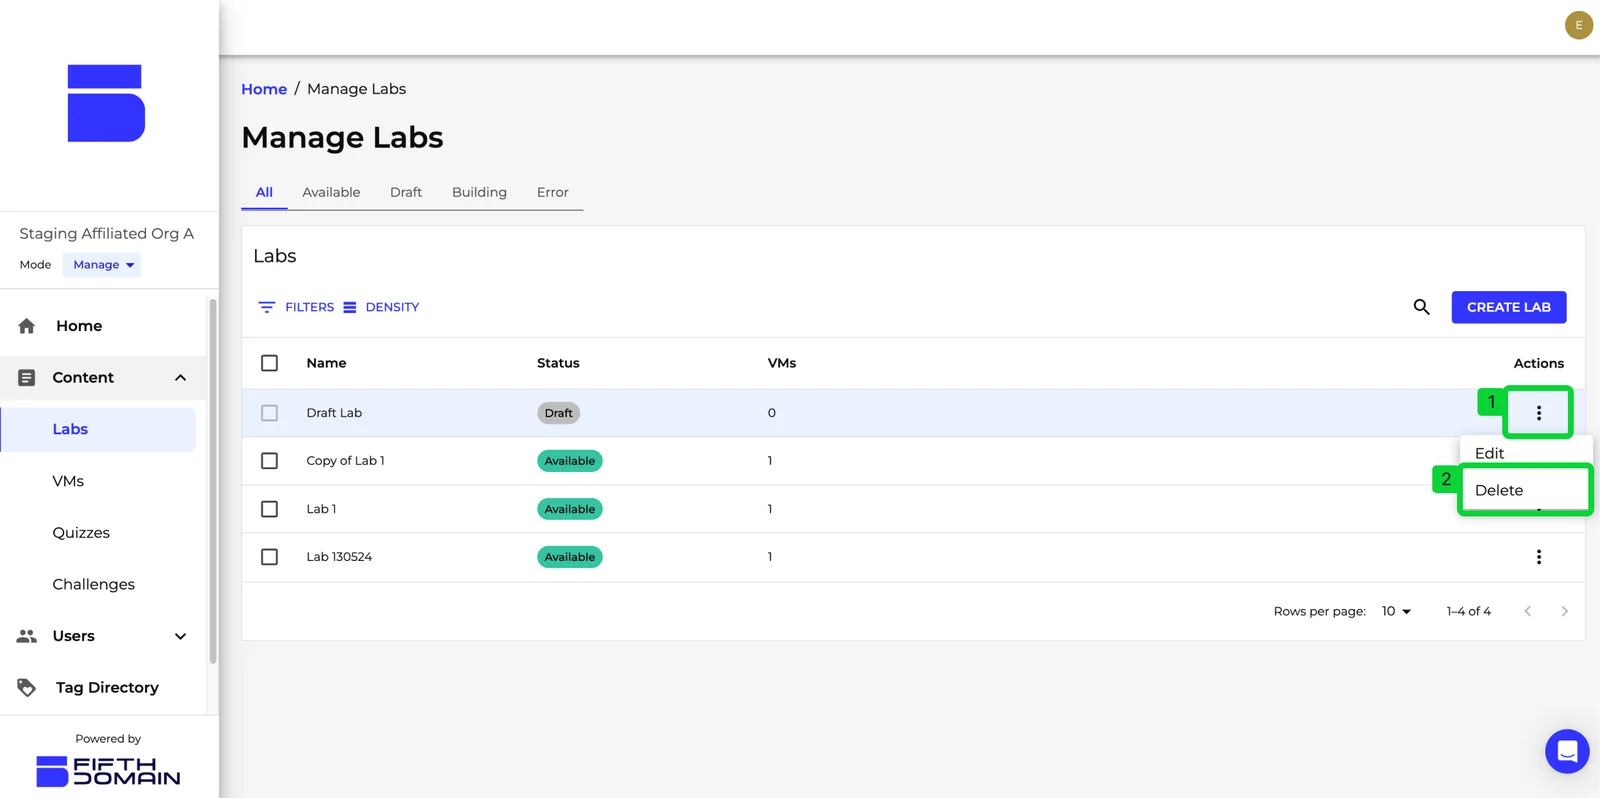
You can delete a lab from the Manage Labs page by clicking the Actions [1] icon for the lab you’d like to delete and then click the Delete [2] option from the dropdown menu. Note that only Draft and Error status labs can be deleted.
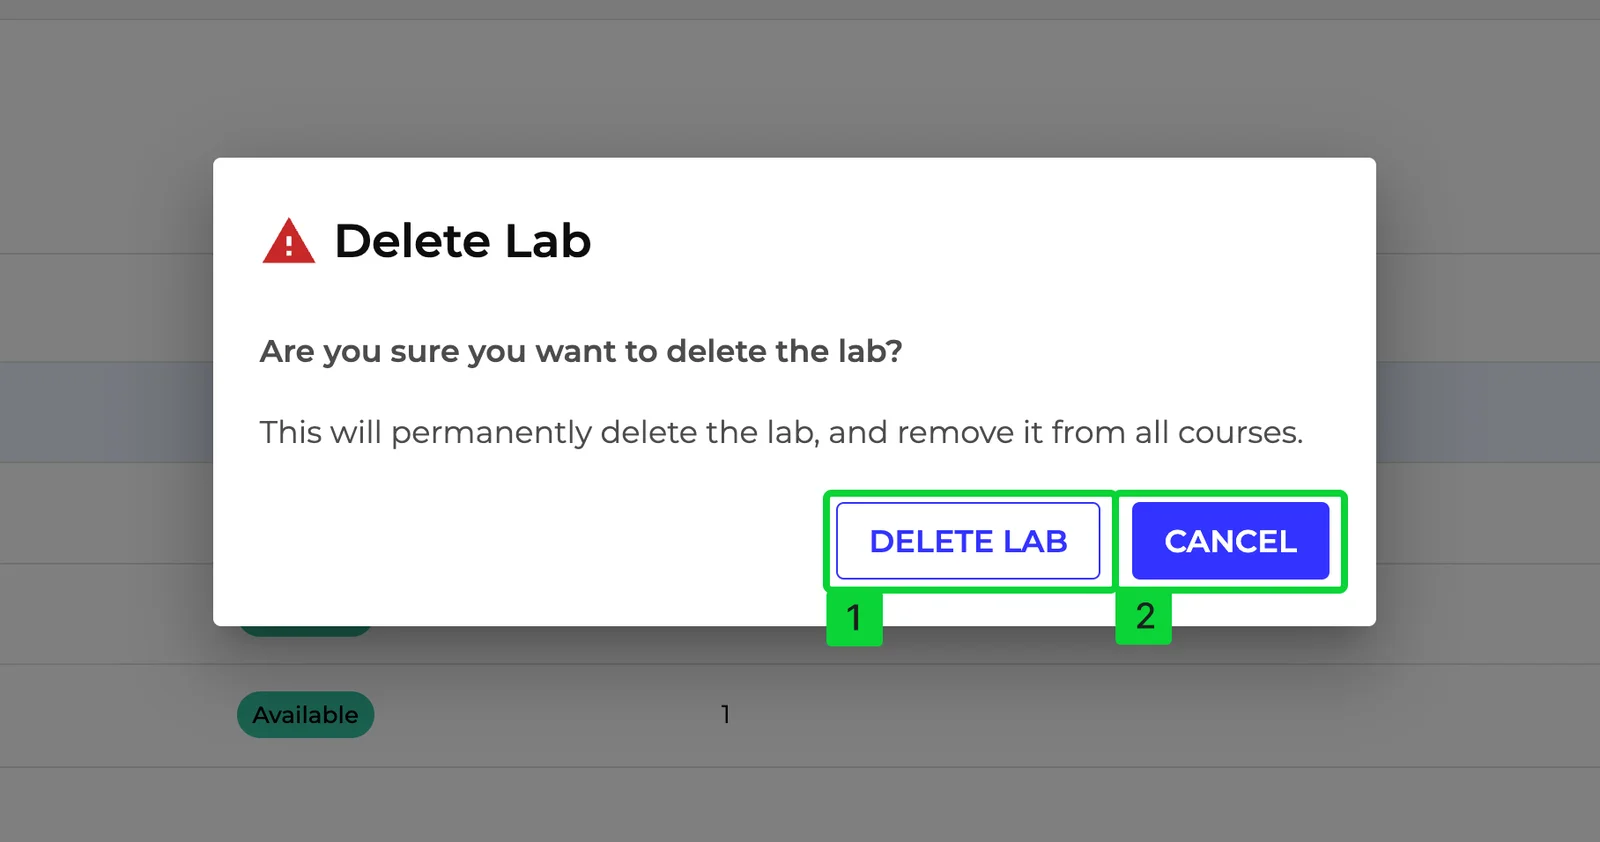
A warning message will display asking if you’re sure you’d like to delete the lab. Click Delete Lab [1] to delete the lab and remove it from all courses it’s been added to, or click Cancel [2] to keep the lab.
Once you’ve deleted a lab, it will be removed from the list of labs in your organisation.