Using VPN in a competition
This article provides information to participants on how to use the VPN in competitions.
You can use the provided VPN configuration in a competition to securely connect your workstation or Jump Box to the Virtual Machines in each challenge.
The VPN uses WireGuard — a modern, fast, and reliable VPN protocol. It establishes a secure tunnel between your device and the lab network, so you can reach the challenge VMs as if you were on the same network. Only lab traffic goes through the tunnel; your normal internet activity is unaffected.
Accessing the VPN configuration file
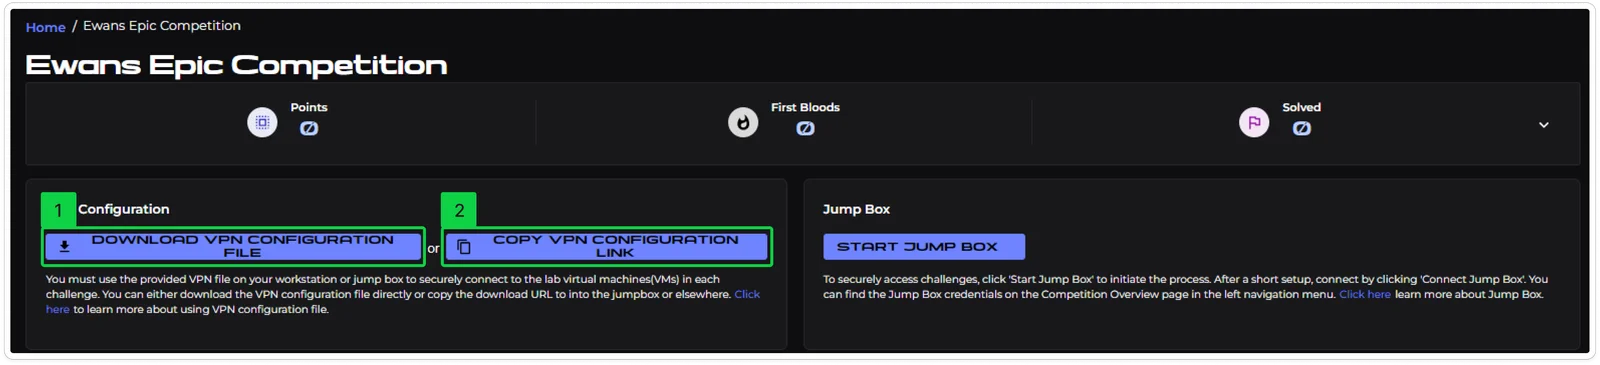
After you enter a competition, you land on Challenges page inside the competition by default. Here, for competitions that have VPN enabled, you will find a Download VPN configuration file[1] button and a Copy VPN configuration link[2] button. You can either download the VPN configuration file directly or copy the download URL to into the Jump Box or elsewhere.
Note: When setting up the connection using VPN configuration link, use a freshly copied link, as it expires every 15 minutes. Once the connection is established, it will persist.
If the button shows "Provisioning VPN access…", your tunnel address is still being assigned — this usually takes only a moment. Once it's ready, download the configuration.
Prerequisite — install the WireGuard client
To use the VPN configuration file you need the WireGuard client installed on your system. It is free and official. Download it from:
All platforms: https://www.wireguard.com/install/
Windows: the installer from the link above (also available in the Microsoft Store)
Mac: "WireGuard" from the Mac App Store, or the link above
iOS / Android: "WireGuard" from the App Store / Google Play
Linux: install via your package manager, e.g. sudo apt install wireguard (Debian/Ubuntu) or sudo dnf install wireguard-tools (Fedora)
Using the VPN configuration file
Once you've downloaded the configuration file (a .conf file) by clicking the "Download VPN configuration file" button on the Challenges page, import it into the WireGuard client and activate the tunnel.
Windows / macOS:
- Open WireGuard and click Add Tunnel → Import tunnel(s) from file.
- Select the .conf file you downloaded.
- Switch the tunnel on with the Activate toggle. Switch it off again when you're done.
Linux (command line):
- Bring the tunnel up with: sudo wg-quick up ./<your-config>.conf
- Confirm it's connected with: sudo wg show
- Bring it down when finished with: sudo wg-quick down ./<your-config>.conf
Note: Your configuration is specific to you — don't share it. On a managed or firewalled network, your IT team may need to allow outbound UDP 51820.
Using IP access for Virtual Machines in the competition
If the competition's challenges include labs, you can connect to the virtual machines (VMs) by using the IP addresses provided in the challenge drawer. To start a lab within a challenge, click the Start Lab button in the challenge drawer.
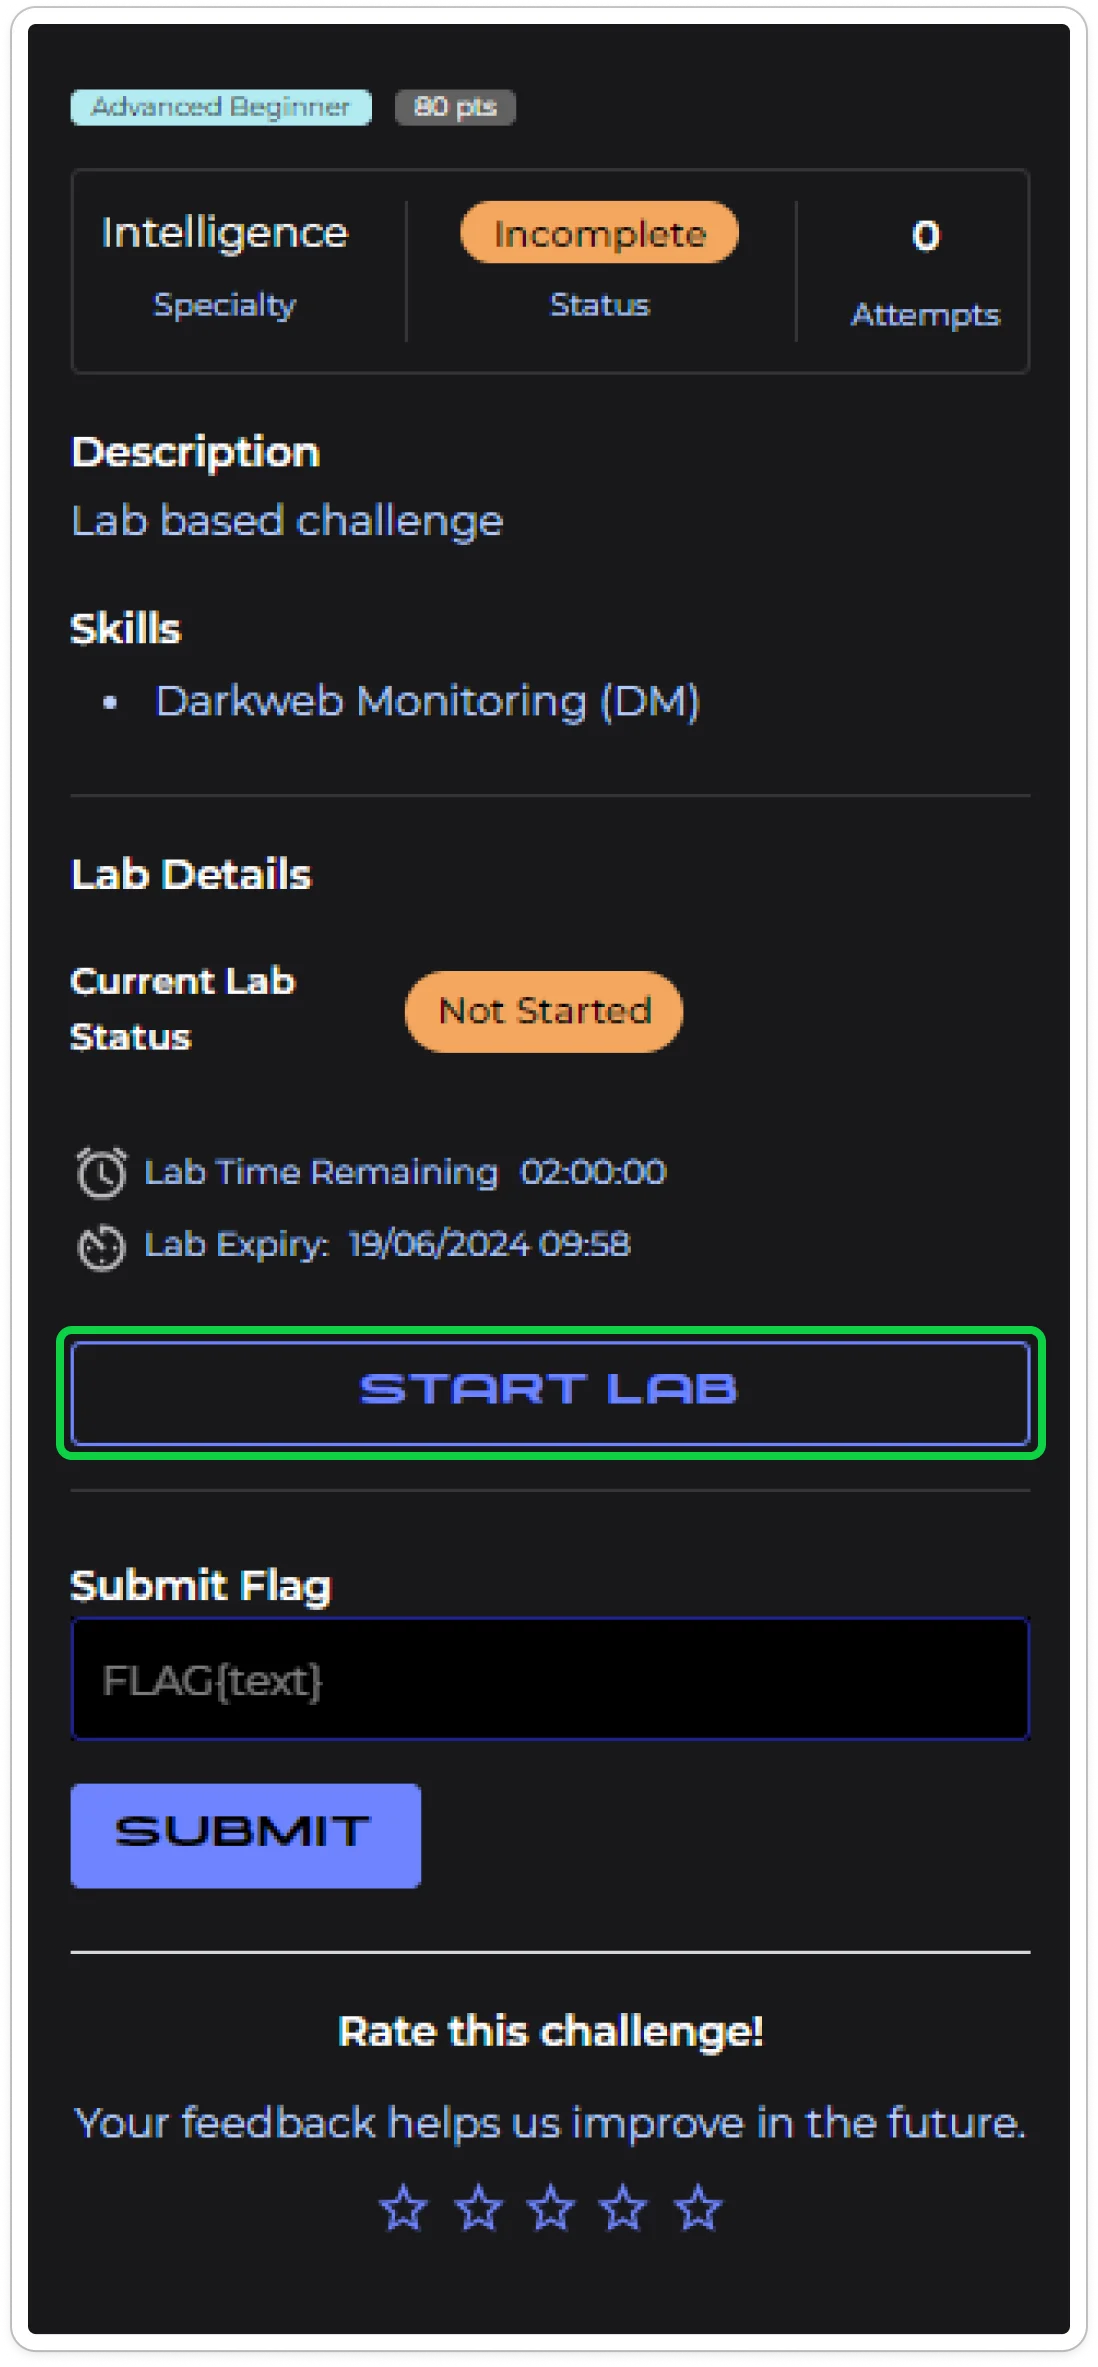
Once you've initiated the lab, wait a short time for the VM IP addresses to appear. You can confirm the VPN connection is working by ping-testing a lab access IP from your terminal or command prompt.
Lab Start Time
When you launch a VPN lab, it can take a short time to initialise. In most cases the lab is ready within about one minute, but we recommend allowing up to two minutes for the environment to fully start and stabilise before you begin working. While a VM's address is still being assigned it will show as "Provisioning VPN access…"; it will appear automatically once ready.
Connecting to the VPN from Jump Box
If you're using the FIFTH DOMAIN Jump Box instead of your own workstation, the Jump Box already has WireGuard installed. After you connect to the Jump Box:
Using the import-vpn command (recommended):
\
- Click the "Copy VPN configuration link" button on the platform.
2.In the VDI console press CTRL-SHIFT-ALT to open the copy-paste menu, then paste the download URL into the textbox.
3.Open a terminal and type: import-vpn "<VPN configuration link>", making sure to enclose the URL in double quotes.
4.Enter the root password when asked; please use 'kali' as the password.
The command downloads the WireGuard configuration and automatically brings up the tunnel. It stays up in the background — you do not need to keep the terminal open.
Note: Use a freshly copied link, as it expires every 15 minutes. Once the connection is established, it will persist.
Manually:
1. Download the VPN Configuration File:
- Click the "Copy VPN configuration link" button on the platform.
- In the VDI console press CTRL-SHIFT-ALT to open the copy-paste menu, then paste the download URL into the textbox.
- Open Firefox and paste the link into the search bar using the "Paste" button.
- Right click and save the file to the desktop, e.g. as "conf.conf".
2. Connect:
- Open a terminal where you saved the config file.
- Bring the tunnel up with: sudo wg-quick up ./conf.conf (password: 'kali').
- Confirm with: sudo wg show.
- Disconnect when finished with: sudo wg-quick down ./conf.conf.